

Photo Color Correction Online: Fix Exposure, White Balance, and Tone
Fix a photo that came out too dark, too yellow, or flat. Facelab's photo color correction gives you 16 sliders for light, detail, color, and finish, from Exposure and Shadows to Temperature, Tint, and Vibrance, and shows each change on the photo as you drag.
Drop your photo here
JPG, PNG, WEBP, HEIC · up to 25 MB
Get 25+ AI-powered editing tools, filters, and creative effects — free on iOS and Android.


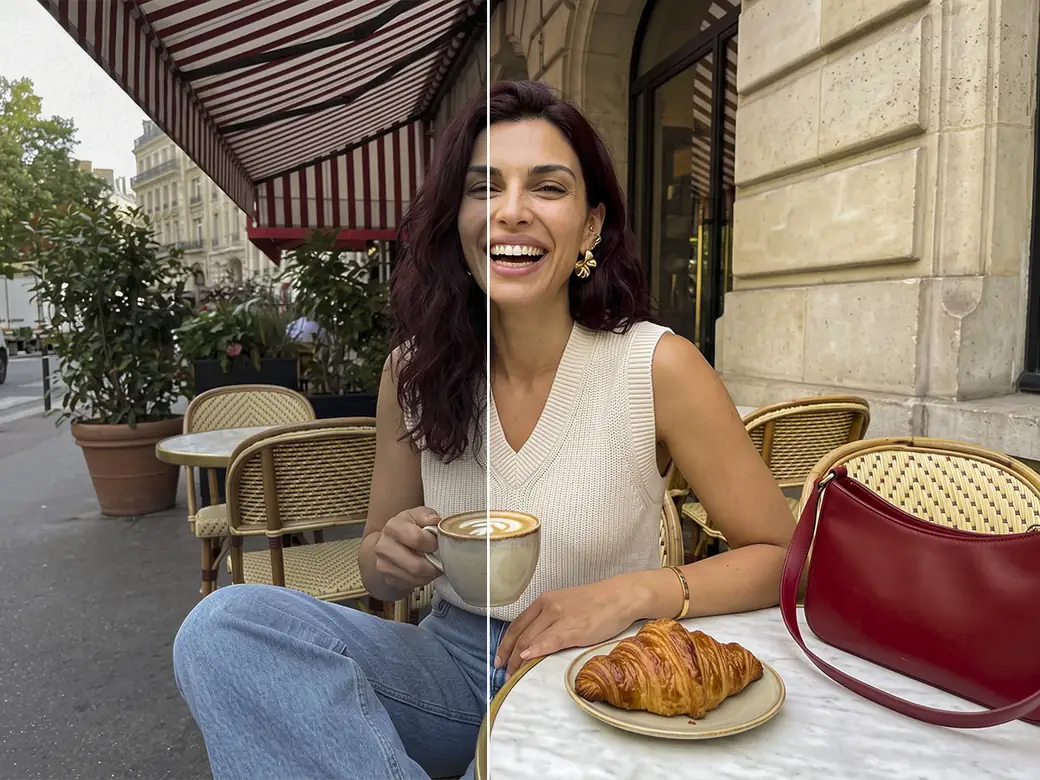
It runs in your browser, so there's nothing to install and you can try it on your own photo. Use it on indoor shots with a yellow cast, backlit portraits with a dark face, or pictures that need a matte, faded finish.
How to Color Correct a Photo Online

Step 1
Upload a Photo
Choose a JPG, PNG, or WEBP file.

Step 2
Fix the Light
Start with Exposure, then Highlights and Shadows, then Contrast.

Step 3
Correct the Color
Set the white balance with Temperature and Tint, then strengthen colors with Vibrance or Saturation.

Step 4
Finish and Download
Add Clarity, Grain, Fade, or Vignette if the photo needs them, then apply the edit and save it as PNG, JPEG, or WebP.
Explore more Facelab tools
AI Make Up Editor
Apply virtual lipstick, eyeshadow, and blush instantly.
Open Tool →AI Hairstyle
Try any hairstyle and color — from subtle to bold.
Open Tool →Object Remover
Erase unwanted objects from photos with AI precision.
Open Tool →Background Remover
Remove any background in seconds with AI precision.
Open Tool →Watermark Remover
Erase watermarks and logos from any image instantly.
Open Tool →AI Teeth Whitening
Brighten your smile with realistic whitening in one tap.
Open Tool →Eye Color AI Editor
Change eye color naturally — any shade, any photo.
Open Tool →Image Upscaler
Enlarge photos up to 4× without losing quality.
Open Tool →Body Editor
Slim, reshape, or adjust body proportions with AI tools.
Open Tool →Skin Retouch
Smooth skin, reduce blemishes, perfect your complexion.
Open Tool →Face Shape Editor
Subtly reshape facial features with natural precision.
Open Tool →Resizing Image
Resize photos to any size without quality loss.
Open Tool →Instagram AI Photo Editor
Edit photos for Instagram with one tap AI presets.
Open Tool →Sky Replacement
Swap a dull sky for a sunset or storm clouds.
Open Tool →Background Blur
Blur the background like a portrait lens, or add bokeh.
Open Tool →Light Effects
Add light leaks, flares and a warm glow.
Open Tool →Photo Textures
Lay film grain, dust or paper over any photo.
Open Tool →Photo Color Correction
Fix exposure, color and tone with 16 dials.
Open Tool →16 Sliders, from Light to Finish
The sliders appear in this order, grouped here by what they do:
- Light: Exposure, Brightness, Contrast, Highlights, Shadows, and Auto
- Detail: Clarity, Sharpen, and Grain
- Color: Temperature, Tint, Vibrance, Saturation, and Color
- Finish: Fade and Vignette
Ten of them start in the middle and move both ways, so you can brighten or darken, warm or cool, add color or take it away. Clarity, Sharpen, Grain, Fade, and Vignette start at zero and add their effect as you move them.

Exposure, Highlights, and Shadows
Exposure and Brightness lighten or darken the whole picture. Highlights and Shadows each work on one end of the tonal range. Pull Highlights down to tame a bright sky or a shiny forehead, and push Shadows up to open a face in the shade.
Shadows lifts the dark parts of the image and leaves midtones and bright areas alone, so the photo keeps its depth. Raising Brightness lifts everything at once, which can make a dark photo look washed out. One limit is physical: areas that are pure white in the original have no detail left, so Highlights can only turn them gray.
Fix a Backlit Portrait
A person standing in front of a bright window or a sunset often comes out with a dark face and a bright background. Start with Shadows to open the face, lower Highlights to hold the background, and add a little Exposure if the face still needs it. When the result looks flat, a touch of Contrast or Clarity brings back shape.
Check the dark areas at the end. Lifting shadows hard can reveal noise, and a small amount of Grain makes it look more like film.

White Balance with Temperature and Tint
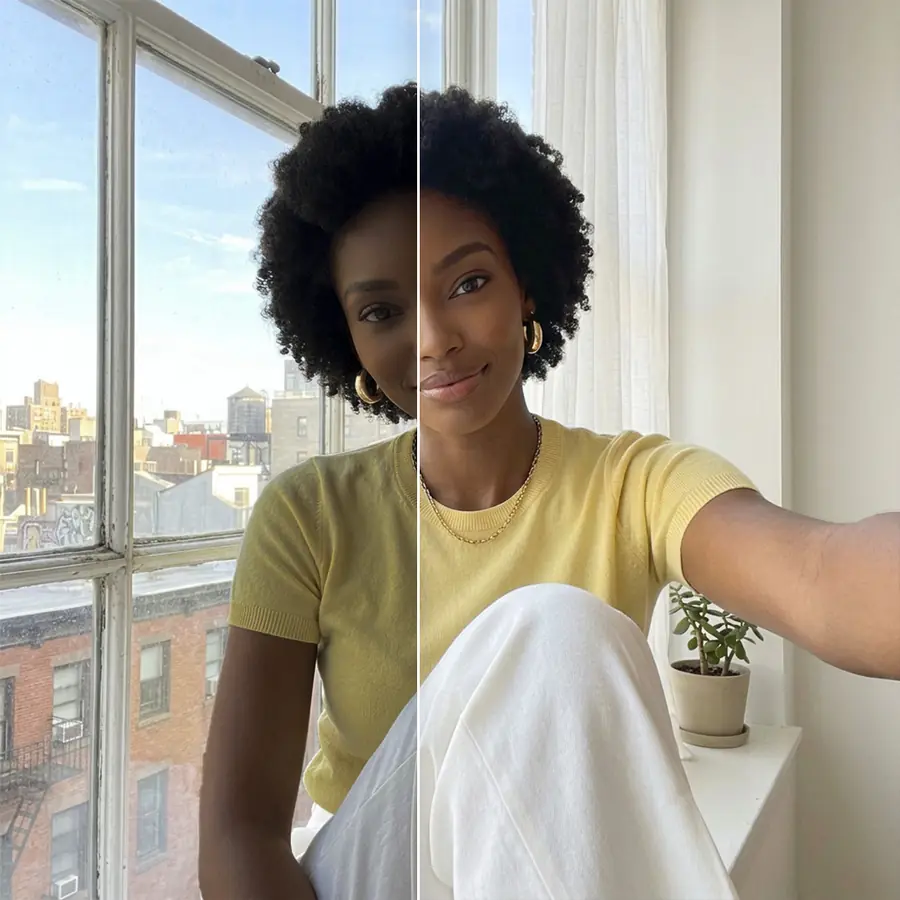
Indoor lamps often turn photos yellow or orange, shade and cloudy days make them blue, and some fluorescent and LED lights leave a green cast. Temperature moves the picture between blue and amber, and Tint between green and magenta.
The quickest way to judge is to find something that should be neutral, like a white shirt, a gray wall, or a sheet of paper, and move the sliders until it looks neutral. Then look at the skin. Many people prefer faces slightly warmer than neutral, so step back a little if the skin looks cold.
Vibrance or Saturation?
Both make colors stronger, and they work differently. Vibrance pushes muted colors, such as a pale sky or dull greenery, much harder than colors that are already rich, and it moves skin tones only a little. Saturation raises every color, skin included, so faces turn orange quickly.
For portraits, Vibrance is the safer choice. Saturation fits a bold look across the whole frame, and moved all the way to the left it turns the photo black and white.
Finishing Touches
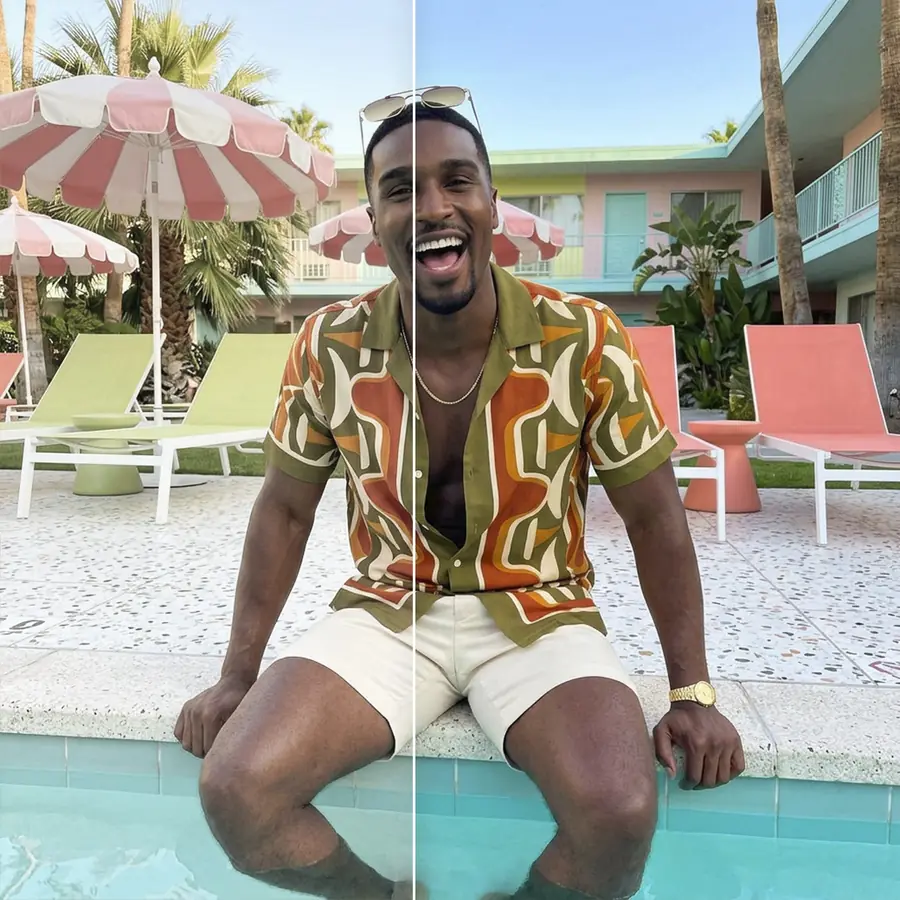
Clarity adds contrast to edges and textures. That helps a hazy photo and also brings out pores and fine lines, so keep it low on close-up portraits. Fade lifts the darkest tones for a matte look, and Vignette darkens the edges to keep attention on the subject. Grain adds film-like noise, and Photo Textures has more types of grain, dust, and scratches.
Color Correct Photos Online, Free to Try
Color correction works in a browser tab so there's no app to download. You can try every slider on your own photo.
Pair Color Correction with Other Facelab Tools
The sliders change the whole photo. For local fixes like blemishes or uneven skin, use Skin Retouch. Once the colors are balanced, Light Effects adds a warm glow or a flare, and Image Upscaler enlarges the corrected photo up to 4×.
What our users say
“I used to spend 20 minutes editing photos by hand. Now it takes 5 seconds. The results look more polished too.”
“Perfect for my e-commerce store. My listings look so much more professional now — and it's instant.”
“I tried every free tool out there. Facelab handles edge cases — hair, fine details — better than anything else.”
“I shoot products on my kitchen table. Facelab makes them look like a proper studio shot every time.”
“Used to outsource at $5 a photo. Now it's instant and free. The quality is identical — clients can't tell.”
“I edit photos for marketing assets in minutes. It completely changed how fast I can ship creative.”


Do more with the Facelab app
Get 25+ AI-powered editing tools, filters, and creative effects — free on iOS and Android.
Photo Color Correction: Frequently Asked Questions
What the 16 sliders do, where to start, and how to keep skin tones natural.
What does the photo color correction tool actually adjust?
Light (Exposure, Brightness, Contrast, Highlights, Shadows, Auto), detail (Clarity, Sharpen, Grain), color (Temperature, Tint, Vibrance, Saturation, Color), and finish (Fade, Vignette). That's 16 sliders, and none of them needs a brush or a selection.
Where should I start if I'm new to color correction?
Fix the light first: Exposure, then Highlights and Shadows, then Contrast. Next, correct the white balance with Temperature and Tint, and only then add color with Vibrance. Small moves usually go further than big ones.
Can I fix white balance and remove a color cast?
Yes. Temperature shifts the photo between blue and amber, and Tint between green and magenta. Adjust them until something neutral in the frame, like a white shirt or a gray wall, looks neutral.
Will color correction make skin tones look unnatural?
It can if you push Saturation, which boosts skin along with every other color. Vibrance strengthens muted colors and moves skin tones only slightly, so it's the better choice for portraits. Check the face after each color change.
Do I need Photoshop or design experience to use this tool?
No. Each control is a single slider, and you see the result on your photo while you adjust it.
Is online photo color correction free to use?
Yes, it's free to try in your browser with no app. The free plan includes 3 edits at full quality with no watermark.
Try Facelab Now!
Virtual makeup, skin retouching, and AI enhancement — free to try right now.
Free to download · No commitment required